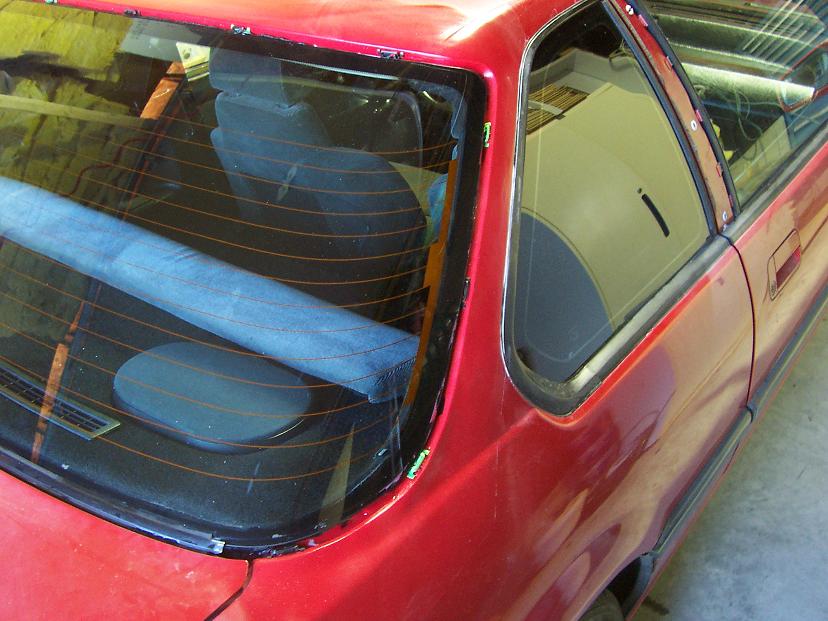
First you'll want to remove almost all the interior (mostly the rear).
It takes about 30 min to do.. or if you've never done it maybe an hour to understand how things come apart I guess.
Rear Window Rust Fix
By: LudaPower
(From:http://www.preludepower.com/forums/showthread.php?t=217885)
Link to this page:
BACK TO PRELUDE3G.COM HOME
I used the same approach as the gas cap area fix. So check that one for some more helpful tips as its almost the same thing. The only big difference between this and the gas cap is that this is a MUCH bigger job.. It took me a week and a half to do.. most of the time restarting pieces because I didn't like the fitment. Be sure you know what your getting yourself into if you ever even try anything like this.
First you'll want to remove almost all the interior (mostly the rear).
It takes about 30 min to do.. or if you've never done it maybe an hour to understand how things come apart I guess.
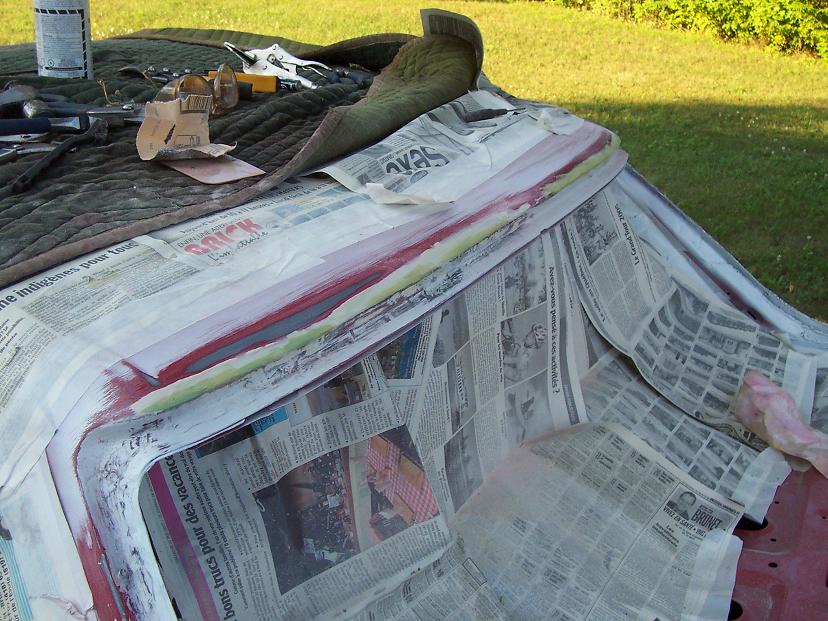
2nd (or first.. whichever you wanna do) I started with taking off the molding.. it wasn't too hard since a lot were already broken and it was holding on with silicon. Be careful not to bend your molding because honda wants a lot for them. But you could always get some at the junkyard like i did.
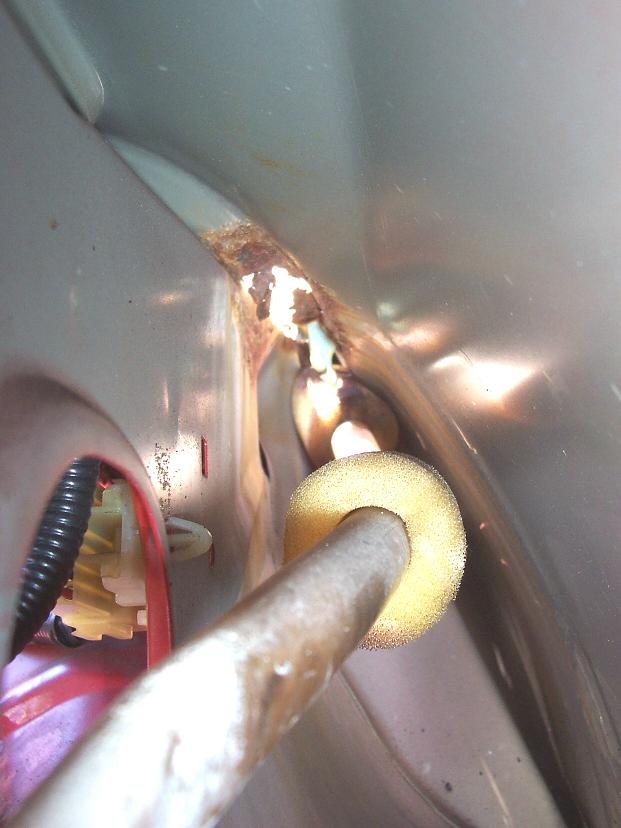
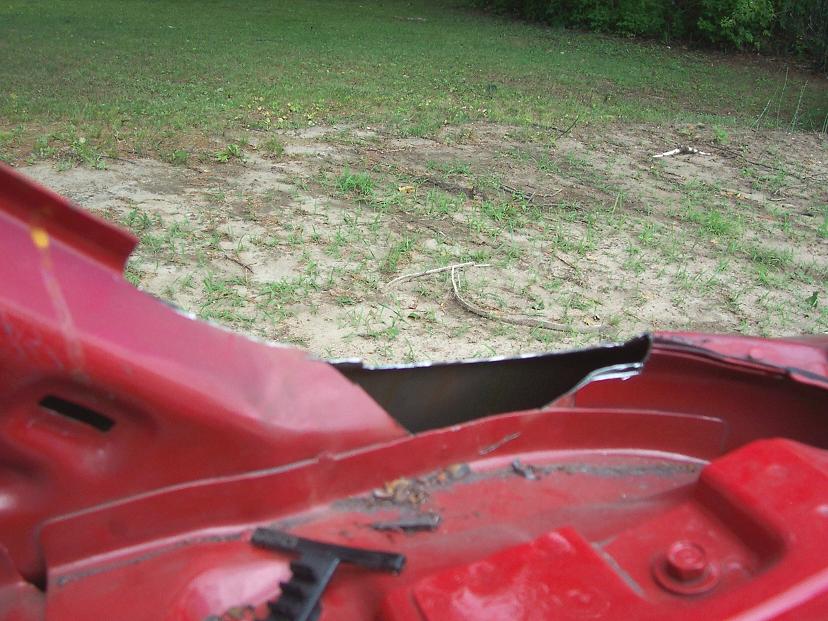
I'd always get water in my trunk.. never knew from where it was coming, then realized that hole leads right to the trunk.
Now that you got all the moldings off your gonna want to remove the window. You can always have a shop or window repair place remove it for you. It shouldn't be too expensive. But I like doing things myself and for free so that's sure as hell what i did.
http://www.honda.co.uk/owner/Prelud...sf100/14-20.pdf
The online manual tells you exactly how to do it. But the only things I used was the piano wire which a local body shop guru gave me. The manual says be careful not too scratch the paint... who cares if your get it repainted anyways. Stick the piano wire through the window glue and have it come out by the other side. Get some vice grips and clamp both ends of the wire. This is the part where you'll need 2 people (in total). You wanna saw away at the glue by pulling.. so one person pulls then the other, be careful not to smash the window with the vice grip.. you never know. The piano wire will probably want to curl over on itself. I don't know why it does this (probably from stretching and heating) but it always ends up kinking and breaks apart.. so be sure you have enough for the job. Once you get all the way around the window it should be real easy to remove. You can remove it with only one person since its pretty light but since your two you might as well both grab and end. Be sure to put it somewhere where it'll be safe for a while and won't break.. I put it in my room on a bunch of bed covers.
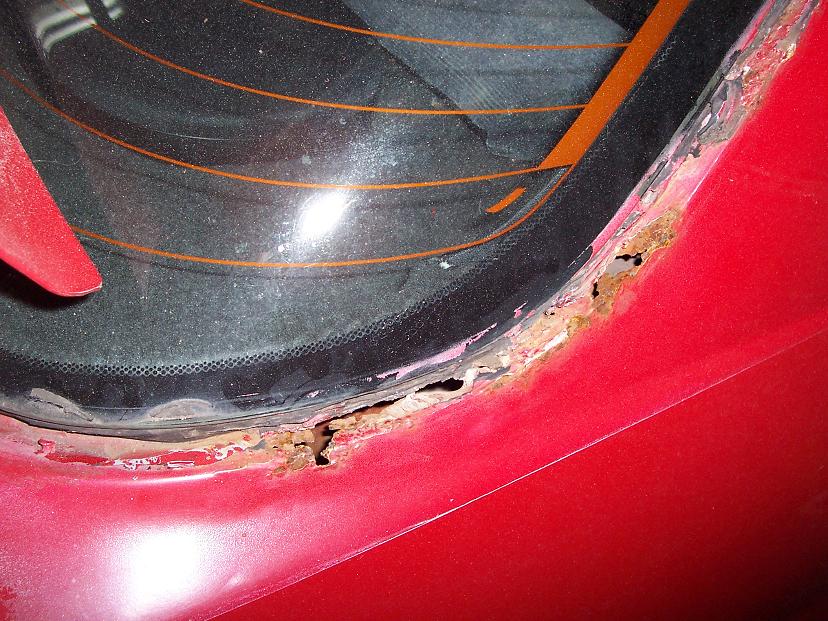
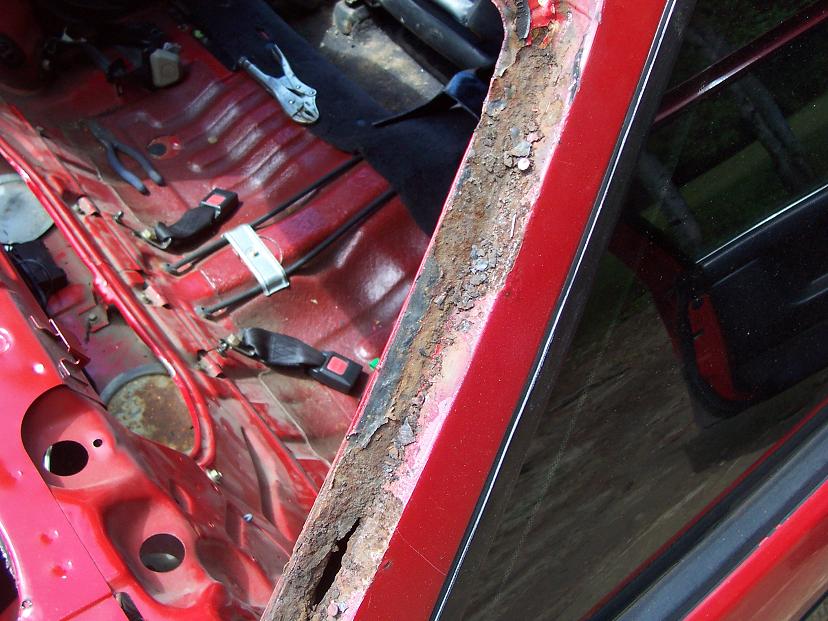
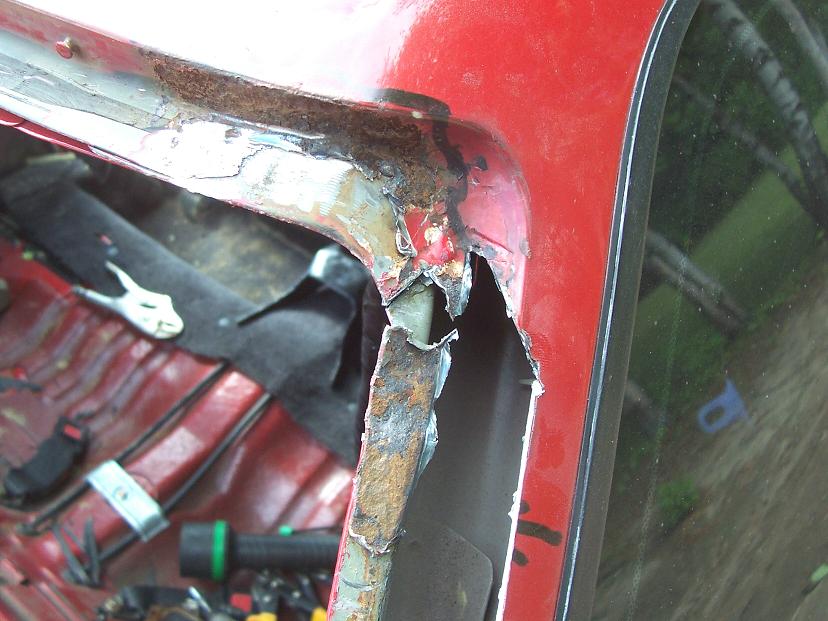
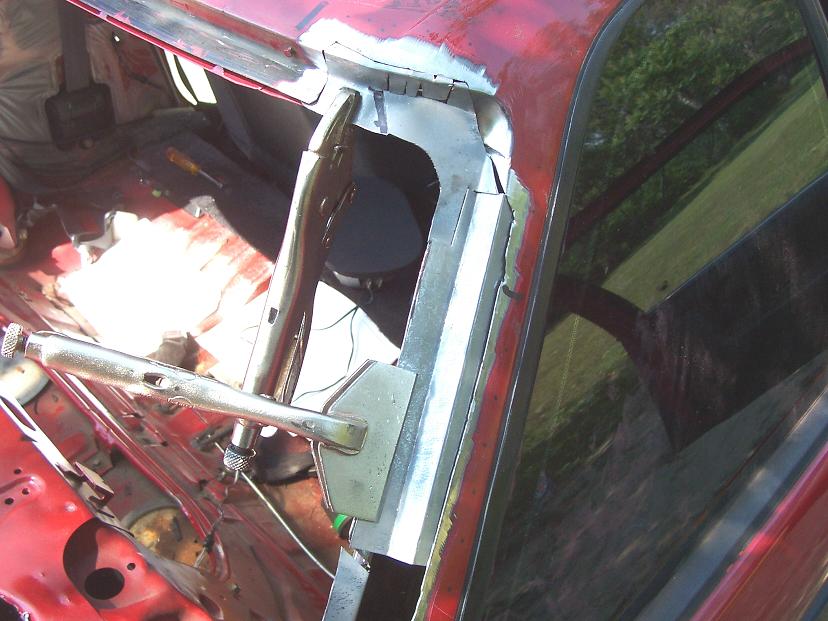
This is what the rust looked like.. pretty bad.
Notice the little tabs that hold the clips for the moldings in place.. you absolutely need those so save them. Luckily that one in the pics was still alive.
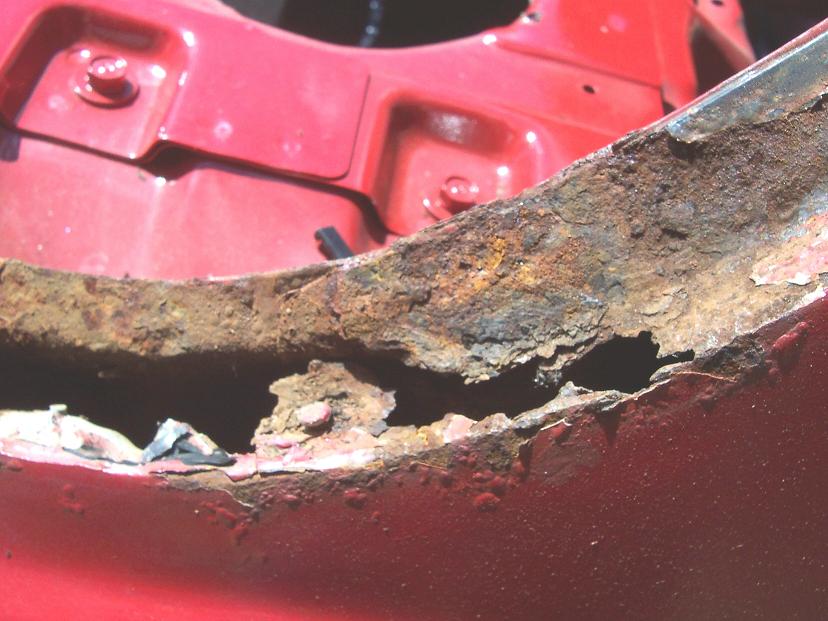
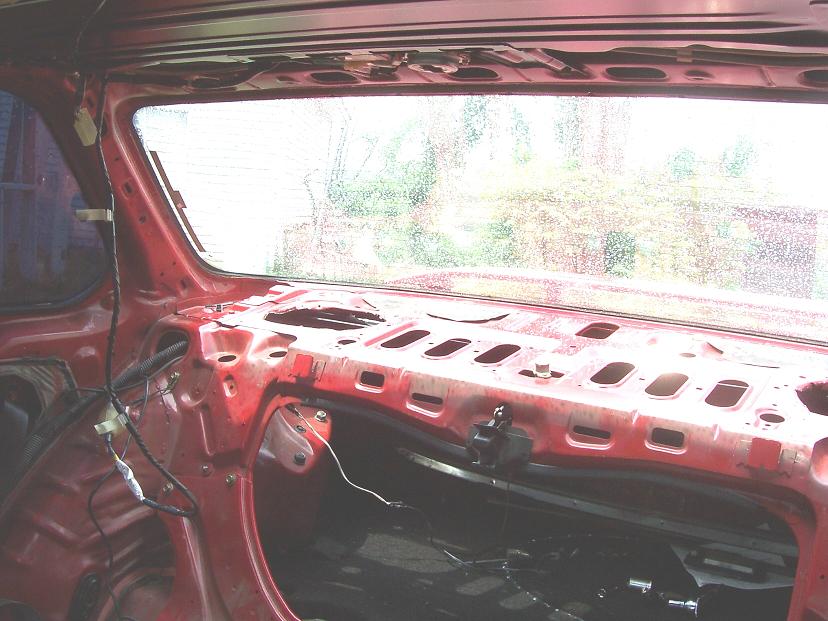
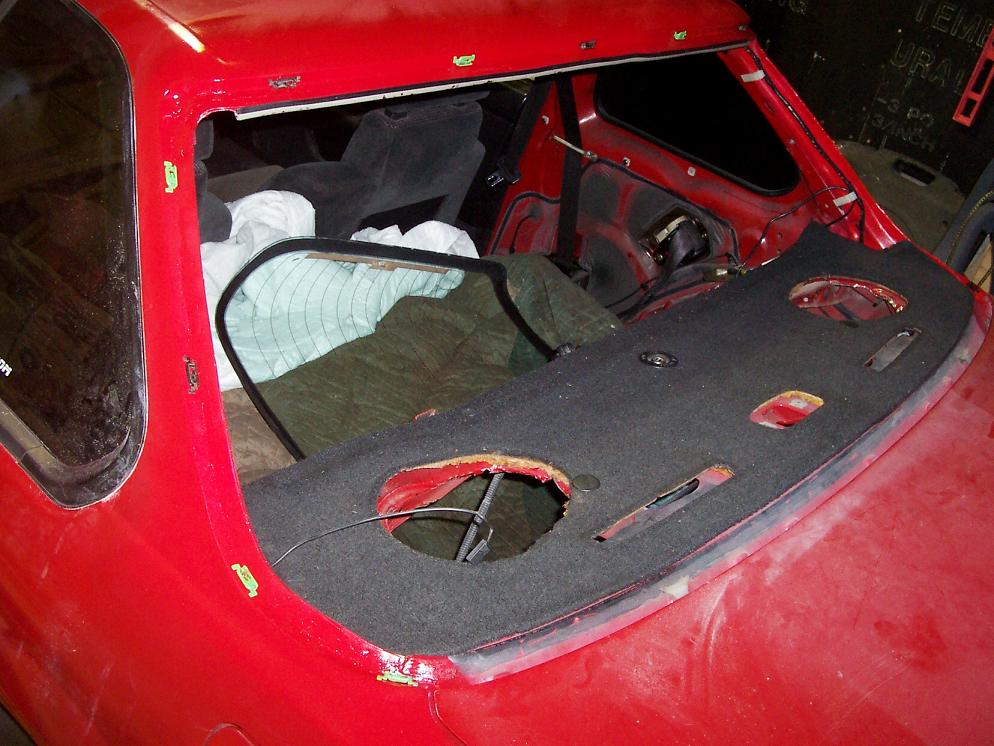
from inside the trunk
The next thing I did was remove all the window glue (or tried too) with a knife.. or you could use a razor blade.. exacto.
Then I started with the dremel and angle grinder. I used the grinder for long lines and the dremel for small hard to get areas.
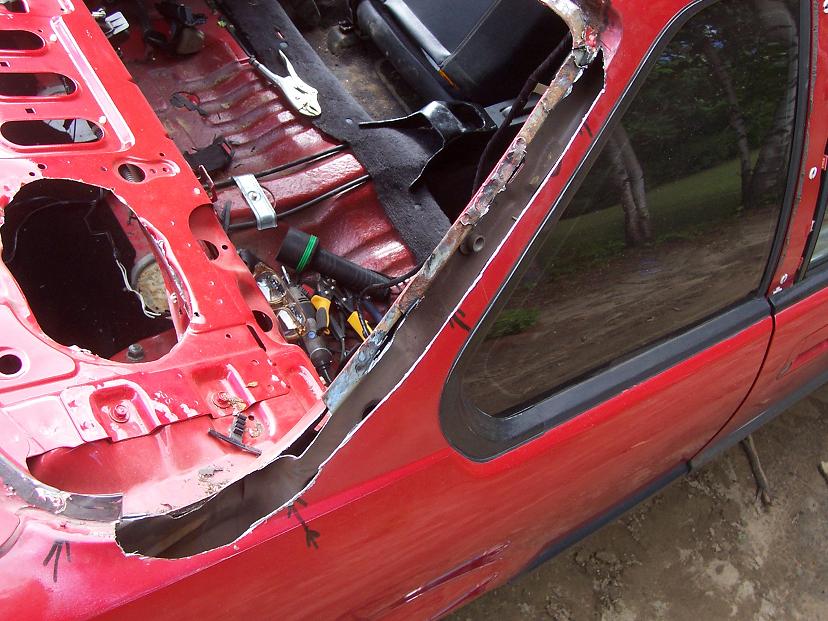
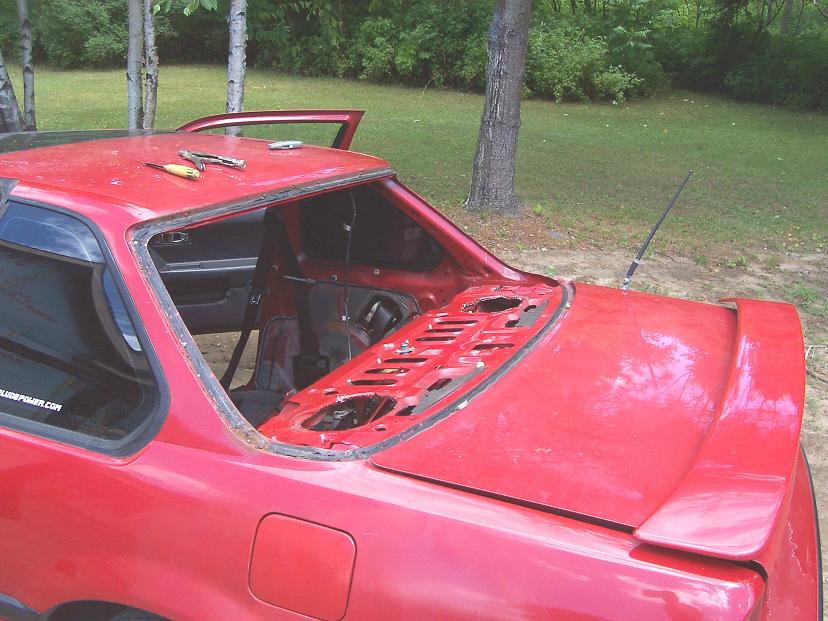
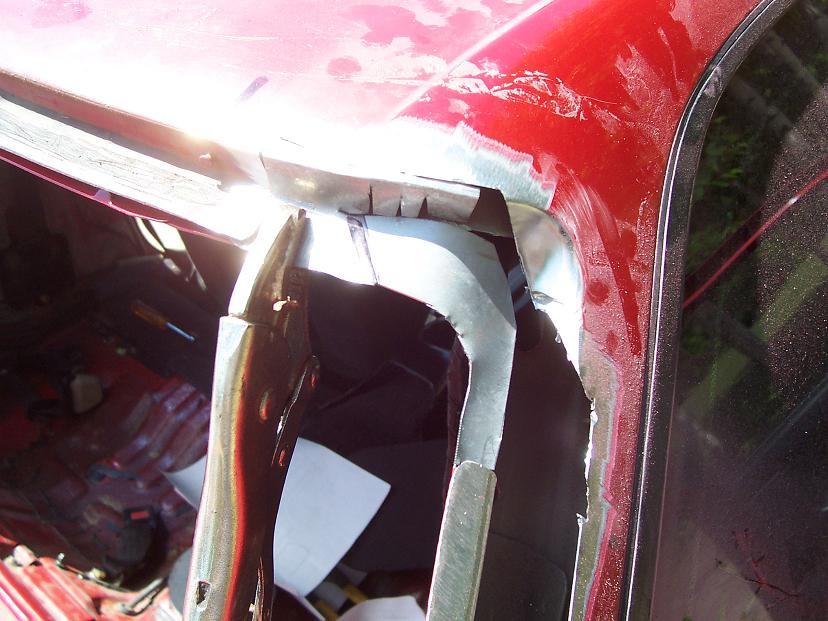
As you can see I had to cut a lot out..

Once I completely got rid of the rust I started mocking up some pieces with hard cardboard (like cereal box cardboard). You simply cut it until you have it how you want.. mark the bend spots and copy it to metal (I made it simple right there).
The pieces you see here are what I started with.. but they changed later on.
As you can see in this pic
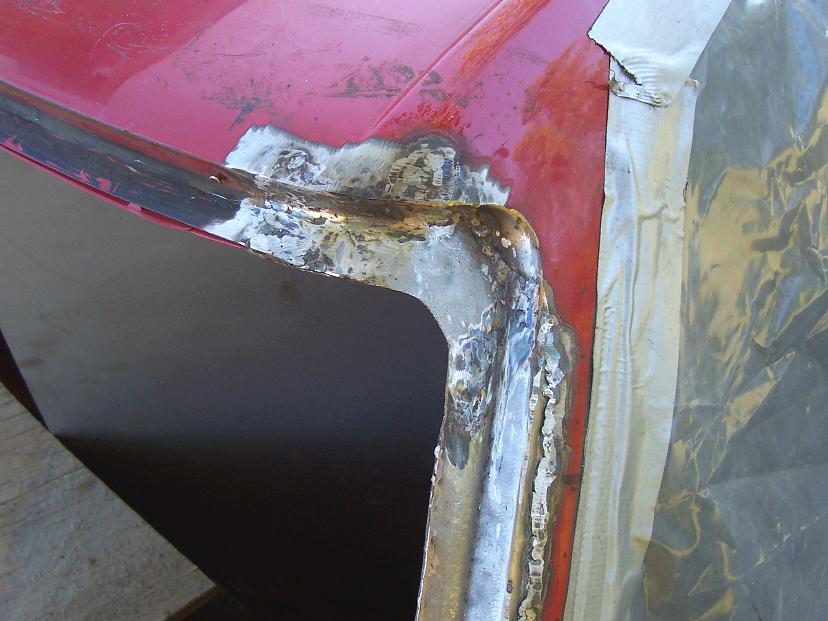
I'm def not a professional welder but at least I get the job done
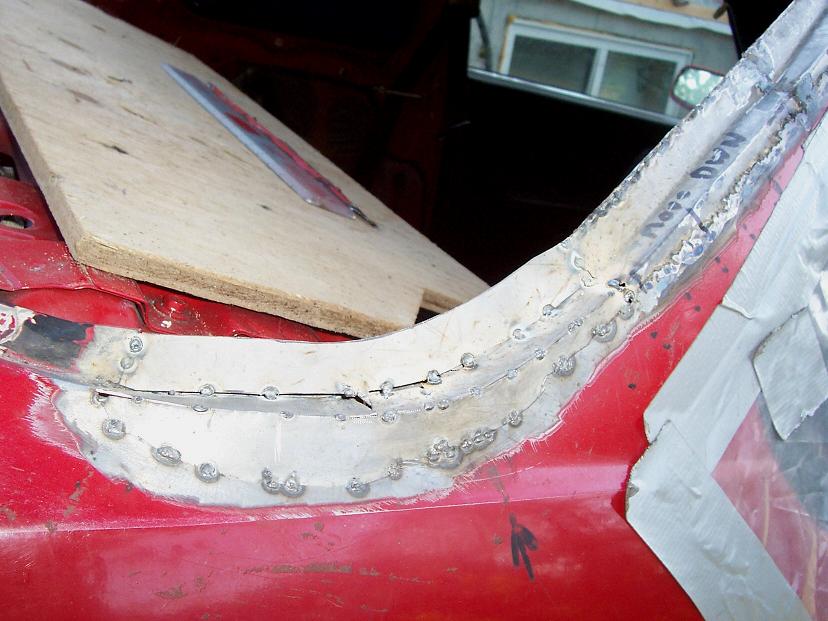
The fitment on the next bottom piece wasn't great so I had to cut out the welds and reposition it. Try not to make this mistake as it sucks.
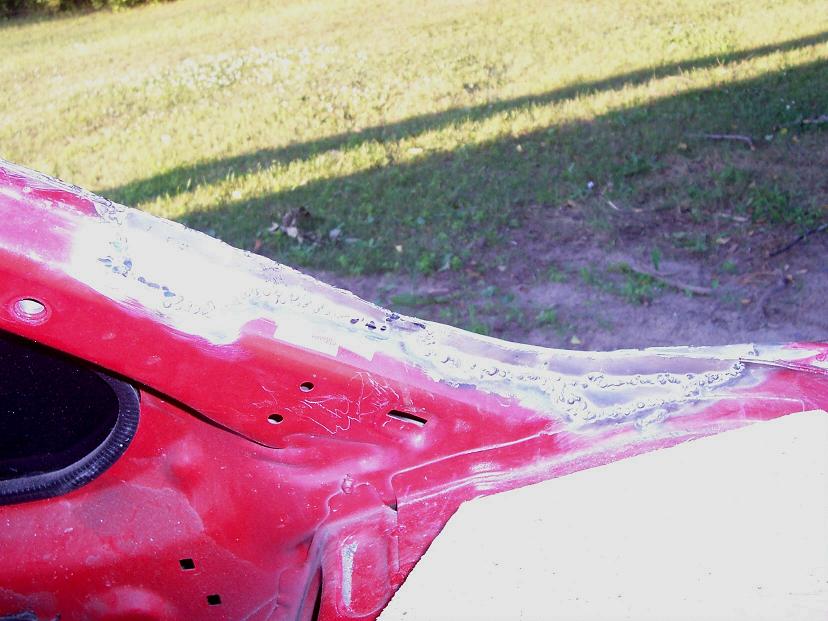
Here you can see my great welding skills (cough)
But it was a pretty hard place to weld at so you can't blame me all for it.
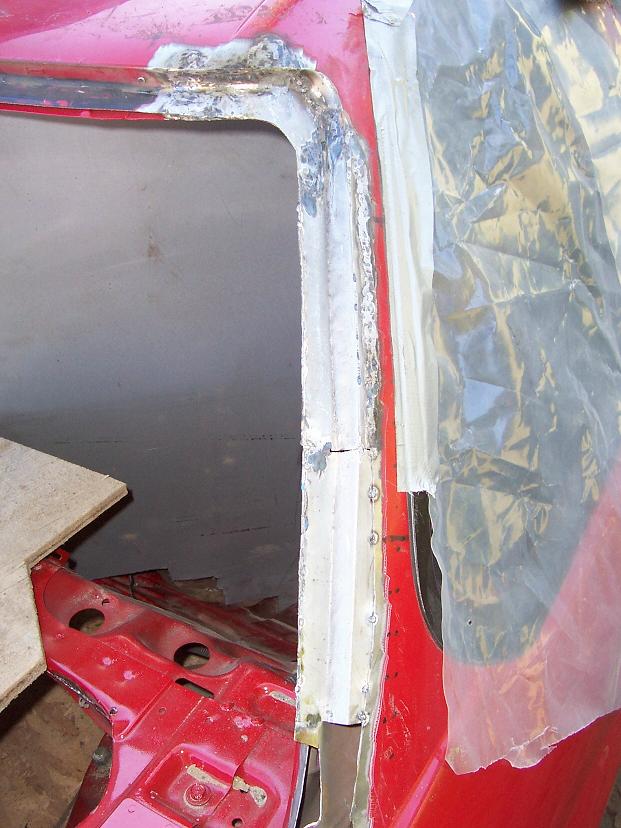
Some more metal work here
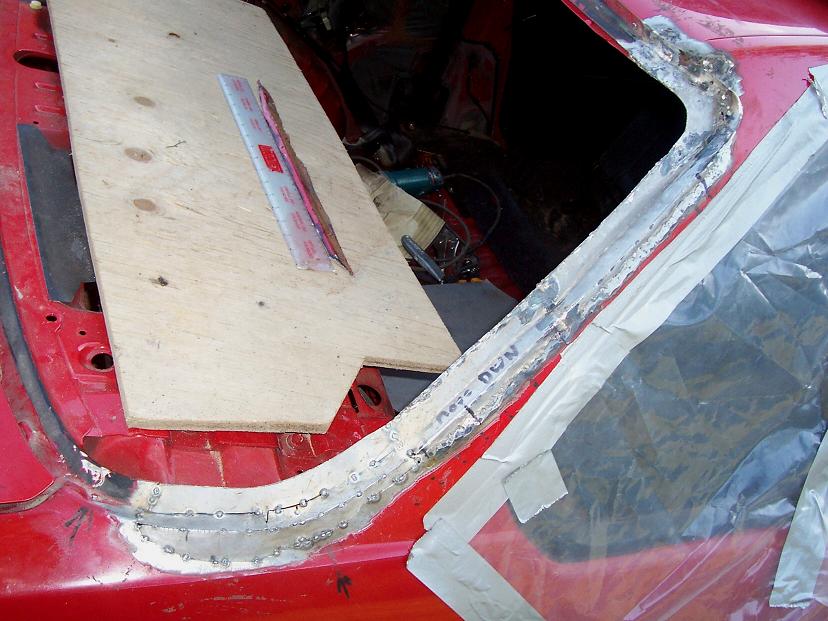
some more bad welding skills here
I don't have a pic of all the metal welded in but you get the idea. Before welding be prepared with a hose or fire extinguisher or both. Also you NEED to cover up your window really good with wood or metal.. that plastic crap didn't do much good and the quarter window has a bit of tiny weld marks you can feel with your hand. Luckily its not really noticeable.
Try test fitting the window..get a flashlight and light up the edges and look on the inside to see if there's light shining through.. this is how you'll tell if its shaped to the window. I used a hammer to get it into place.
After you do that you'll wanna weld in those little tabs for the molding clips.. Be careful welding them in because they're stupid small and melt easily.
Also you gotta remember before doing any of all this to test fit the window often with the moldings to get the right angles and curves.. but if your actually gonna do this then you'll probably know that.
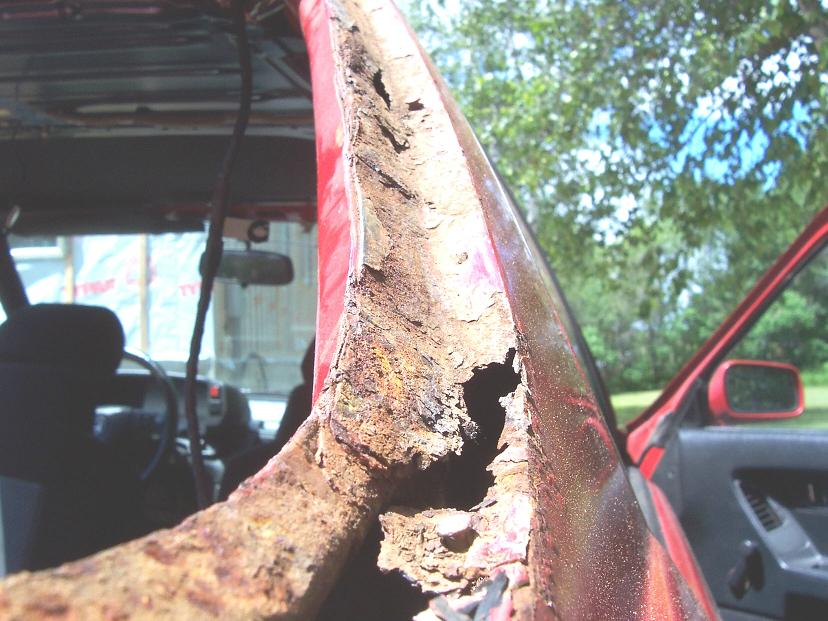
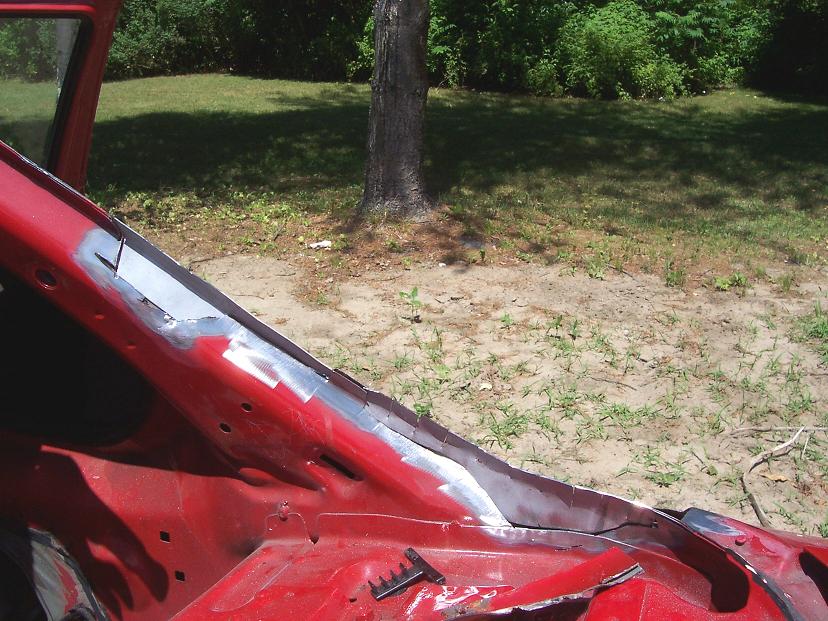
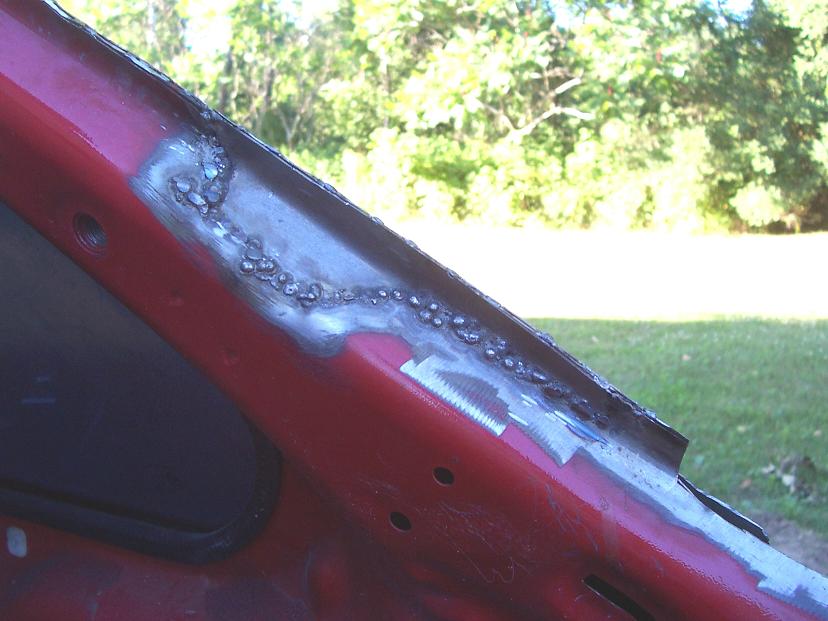
I also had to do a small spots on the drivers side that had perforated rust
The top of the window was just surface rust that wasn't perforated luckily.. I had to grind everything down and use filler to get everything perfect again.

Don't put bondo, filler, putty or any type of that stuff where the window will sit on. The window glue needs to stick to the metal (paint).. if you have it stick to something like filler and get into an accident.. it'll probably be weaker in that area and come out easily.
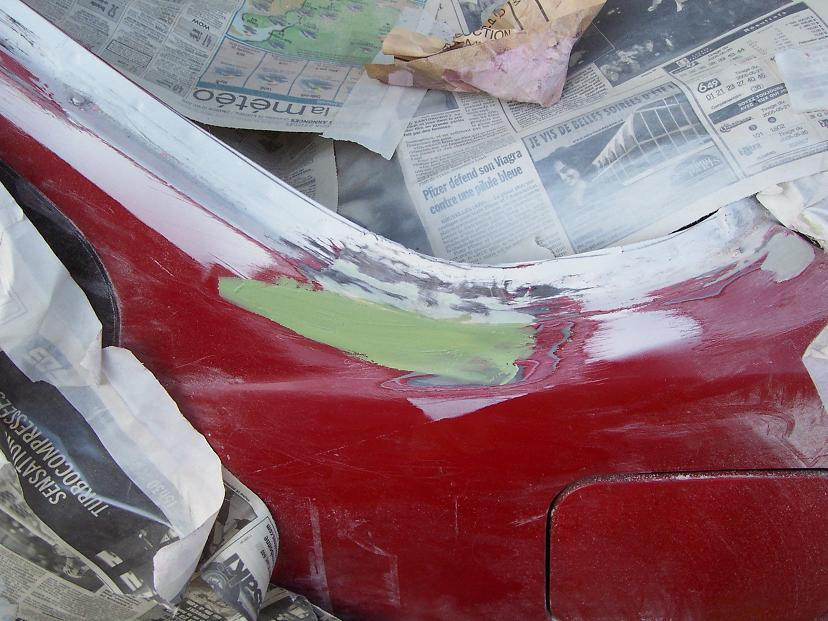
When your done all the filler work, primer and paint (wow that was fast!)
It should look like this

My paint didn't match.
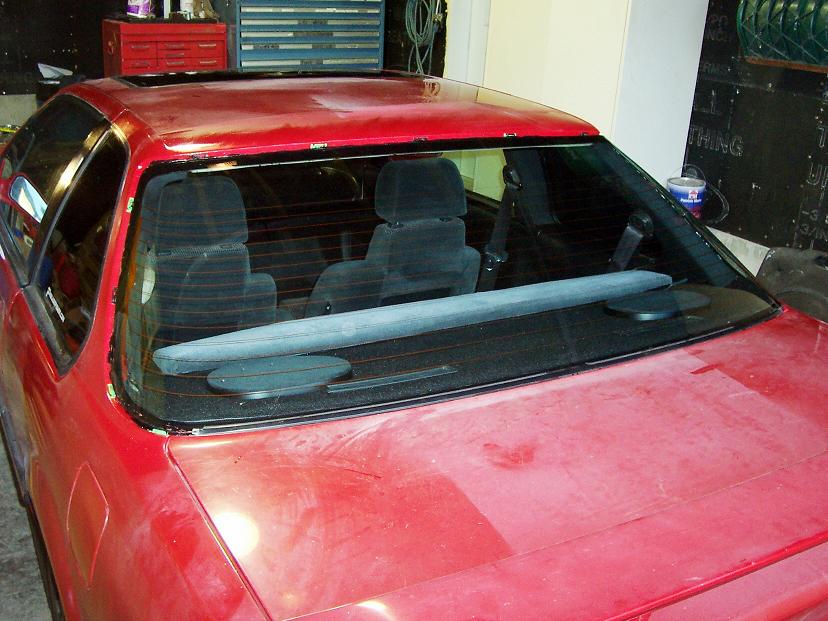
You'll wanna remove all traces of the window glue before painting and then just sand over everything. Your better off bringing it to a window replacement shop to get the window reinstalled. It cost me 70$ canadian to have it reinstalled. You'll want to remove all the glue from the window also and clean it up with some alcohol.. here it is before i left for the shop (yea that's right.. I drove with no rear window. )
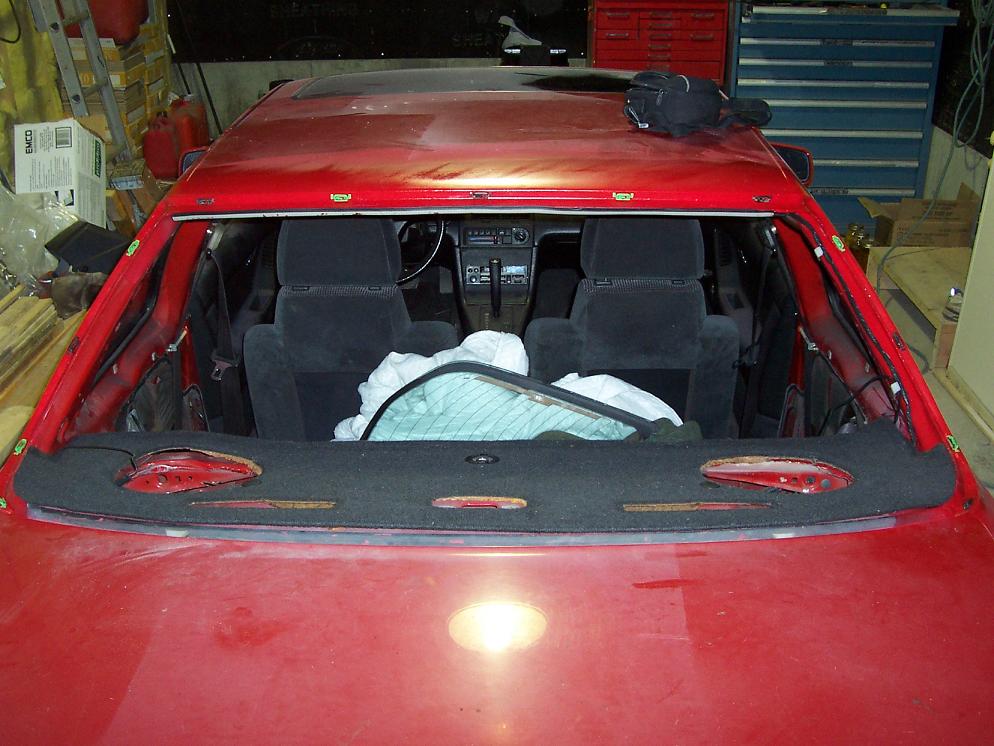
Here's after the window was professionally installed (the guys did a great job!)
I didn't bring my moldings there because I didn't want them to install them (being those clips are hard to get).. I suggest you do bring em because it'll be easier for them to adjust the window into position.
I probably missed a couple things (a lot of things) but this is just a run down of how it could be done. There's probably a bunch of different approaches but this is how I did it.
Also about the clips.. there was 2 3rd gens at the junkyard here and almost all of the clips broke.. 2nd gen accords use the exact same clips as ours and there's a ton of those everywhere.. also I'm sure they're cheaper at honda than the prelude ones.