2. I removed the factory radio/ash tray holder and pocket below the factory radio. (Unplug the cig lighter first to have more play)

OEM 2009 Navigation Install
By: kflashdotcom
(From: http://www.preludepower.com/forums/showthread.php?t=308020)
Link to this page:
BACK TO PRELUDE3G.COM HOME
It goes without saying, I LOVE 3rd Gen. Preludes.
BUT, I missed all of the technological stuff the newer cars have...
Solution:
2009 Honda Element AVN Navigation Complete Install including:
Bluetooth, XM Audio, Voice Recognition, Amplifier, and of course, Navigation. ( I also ordered a rear camera from a 2009 civic, but my element hardware does not support it.)
You have to choose, Rear Camera, or Bluetooth, and in California, you NEED Bluetooth now...
What you have to buy / acquire:
2009 Honda Element Navigation ECU
2009 6.73 Database Disc
2009 Honda Element XM unit and Activation
Honda Dealer Parts Counter XM antenna.
(Don't get one made for a car, the wire is too short, they have a special one that's generic with a long wire)
2009 Honda Element Navigation Microphone
2009 Honda Element HFT ( Hands Free Unit )
2008 Honda Oddyssey Voice Recognition Button
2009 Honda Element Wiring Harnesses including behind radio, and under dash. (there is probably more than one harness you have to get,try your local Honda Salvage Yard)
( I couldn't quite figure out what I need to do to be able to post pics right here...more posts first?)
Play by Play:
1. I removed all of the center console, including the area above the vents.
(Please don't forget the two screws under the AC, someone already broke mine before I started... Dang previous owner!)
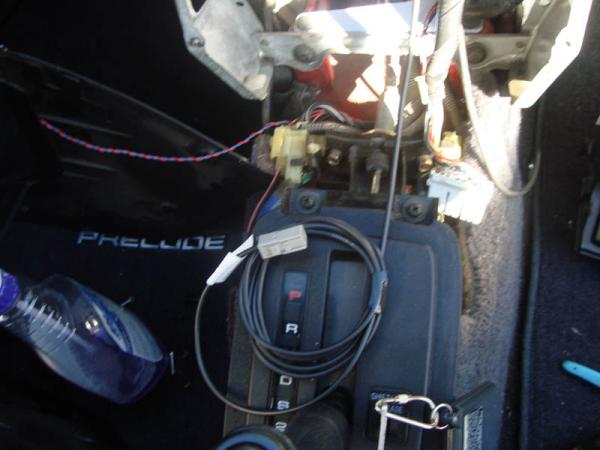
2. I removed the factory radio/ash tray holder and pocket below the factory radio. (Unplug the cig lighter first to have more play)
3. I tried to directly fit the 2009 Radio in the factory bracket, but the bracket was just waay too short.
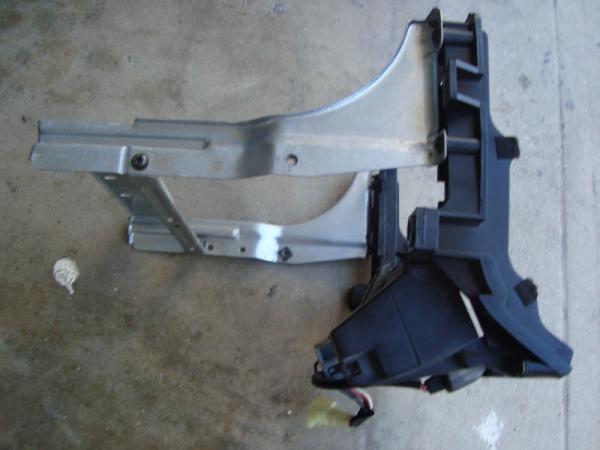
4. I cut the bracket, and used the cut off pieces to support and mount the AVN into the factory bracket. (Be sure not to flush the radio too far, or you cant access the CLOSE /OPEN button.)
5. I used ALL of the pieces I cut off, as brackets. (recycle man!)
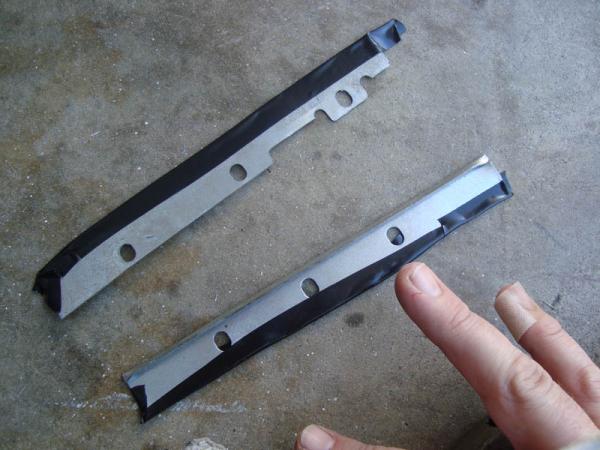
6. I am an Expert at this kind of thing yet I still cut myself several times.(see pics) SO, I HIGHLY recommend to put tape all over the sharp edges before, during and after working here. (think of serviceability later!)
7. I used self tapping screws into the metal bracket to support it and used the factory cross brace as a support. I used the factory radio screws to mount to the side of the AVN.
8. I prepared the harness outside of the vehicle. I cut off all plugs from the harness, and made it neat like an aftermarket alarm install or radio install. I labeled all of my wires to make it easier to service later. I made sure I could extend the harnesses far behind the radio since there is not a lot of room. ( I learned this with Trial and error, I tried to fit stuff behind radio... YA RIGHT!)
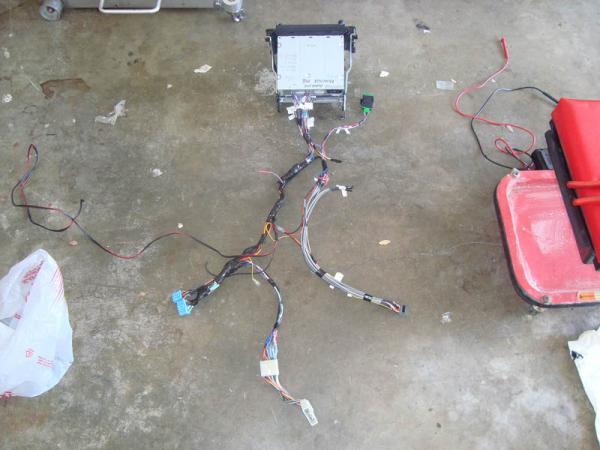
9. I cleaned behind the radio all the dust with a rag and 409.
( I am a fanatic about that... anywhere I work, I clean first so I know I've been there... )
10. Then I figured out where to mount everything since I already found out it was too tight behind the radio.
11. I put the GPS antenna, above the AC Vents, cleaned it very well with Acrysol, then used body molding tape to stick it to the plastic. (It works very well through the plastic and glass.)

12. I put the XM antenna on my dash, but it is not working so well... XM says it must go outside, so I will be moving it.
13. I put the factory Pioneer amp, under the only space between the driver and passenger against the firewall, under I think the heater.
14. I put the XM module, all the way in the drivers kick panel and wire tied it to what looked like the cruise module harness.
15. I mounted the rear camera on the rear deck. (Even though its now useless)
16. I tapped the VSS line at the main ECU computer under the passenger floor board ( 4 10mm screws) White/Blue Wire on the right hand side plugs. (Lower plug)
17. I tapped Reverse wire right at the shifter, Green/Black.
18. I tapped the parking lights, 12V, Ignition, Speakers, Power Antenna, ground at the factory harness.. I used a harness adapter so I didn't cut any plugs.
19. I mounted the Microphone for the Voice Recognition in the rear view cover. I took the microphone completely out of the housing, and used a large Unibit and made a perfect size hole for the mic, and Hot glued the S*#t out of it in there. (same location as all Factory Honda/Acura Mics)
20. I removed the driver side visor, and ran the wires in the headliner, down the Drivers a pillar. ( I used a long wire tie as a fish to easily get the wire from A Pillar, to Center Console.)
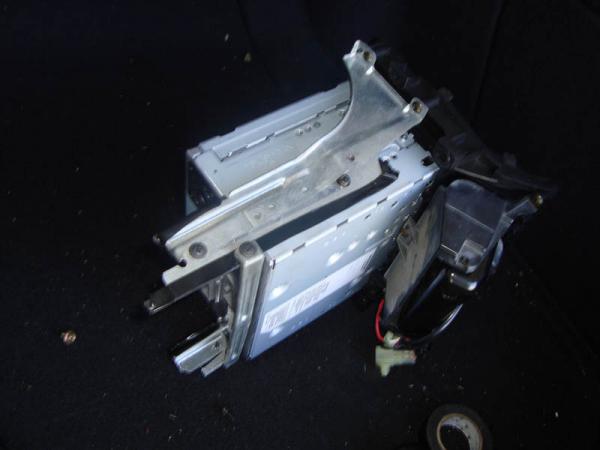
21. Then I barely squeezed that big 'ol radio into the dash, but it still BARELY fit!
22. I used the four factory screws to get it into its perfect flush position, tightening the screws like you do lug nuts, top left, bottom right , bottom left, etc.
23. I checked to make sure I did not pinch any wires. ( I was OK, phew!)
24. I mounted the Honda Odyssey Voice Recognition Switch right into the side of my steering column since our steering wheels don't have a connector in it.
25. Then I connected all the wires and powered it on...
26. Everything worked OK, except Rear Camera and XM reception is not great with the antenna inside .( I found out if you get the 2009 Honda Civic AVN, it has rear camera but no Bluetooth)
27. Also, The illumination wires are tricky and I haven't completely figured it out yet... it requires Illumination + for the Navi, and Illumination - for the radio buttons. ( I didn't find illumi - yet, but I'm told its at the dimmer)
After all this, I was SOOOO happy when I turned the key on and saw that unfamiliar Honda Logo Globe Boot Up Screen in my Old School 91 Lude... It kind of made my year, and brought a tear to my eye...
Suddenly, all those cuts didn't hurt so much!
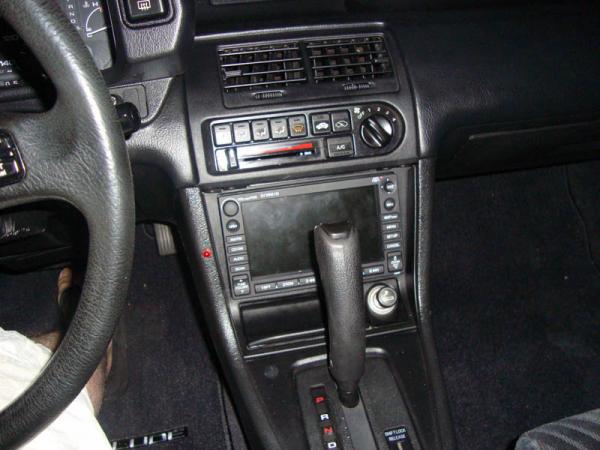
It was something I never expected to see in our old cars, yet It fit so well.
One caution... when the faceplate comes down, and the car is in park, it VERY slightly hits the shifter... its better if you don't open it when the car is in Park for Automatics...
If you follow these step by steps.. you too can bring your car up to the latest technological advances.
I hope my write up helps anyone doing this.
One comment.. I have an unfair advantage at getting these parts because where I work for a living... =P