I Finally took the time to fix mine today so I figured I'd make a more detailed explanation on what to check.
Low Fuel Light Fix
Take a seat in the back of your car, pull the backseat down, move the carpet over or whatever crap you have in the way in the trunk. Now look straight in your trunk, at left and right you will see two steel circular covers. Take off the one to the left.. it's stuck on with some type of silly putty glue stuff so it's easy to stick back on.
You will now be able to see the fuel gauge sending unit.. at least the top of it
Remember.. the thing around it is the gas tank so don't jab at it with a screwdriver for fun not that I did but..
Disconnect the wiring clip from the sending unit.. and attach a wire from the A terminal to the C terminal. Turn your key to the on position first. Now look at the gauge cluster. Did your fuel light just come on?
If it didn't come on, then your problem is most likely that the bulb is burnt. Try swapping it with another working bulb in the cluster. Or else the green/red wire is cut.. or there is no power to the gauge which I highly doubt.. being that if there was no power then everything else wouldn't work either. And circuit boards don't normally naturally cut contacts on themselves. Emo boards don't exist yet.
If the light came on then your gonna have more work to do.
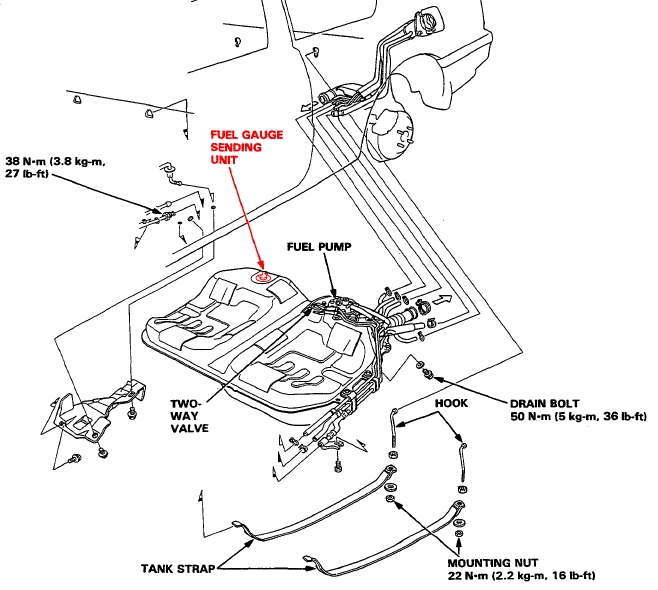
Here is where the sending unit is located on the gas tank:
Now I suggest before taking out the sending unit to go to the honda dealership and buying the gasket that goes underneath the sending unit.. I got myself in a crap spot last year when I took out the sending unit and that gasket was garbage. Obviously honda never has anything you need in stock so it took a week to get, I believe it was like 5$. Don't use any other gasket as this one is made specifically for gas. Don't try silicone either or it will disintegrate from the gas (I tried all this).
So let's say you got your gasket.
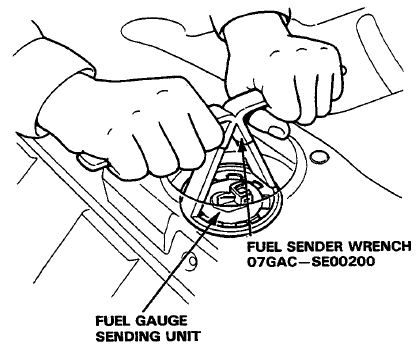
Now take a look at this page and notice the man taking out the sending unit somehow has his body integrated into the passengers side of the car. He is probably a magician and is stupid enough to not use his magic powers to make a McLaren f1 appear in front of him.
Actually notice the Fuel Sender Wrench he's using.. well they don't have those anymore.. and either way I'm sure it would cost 100$ at honda if they did.
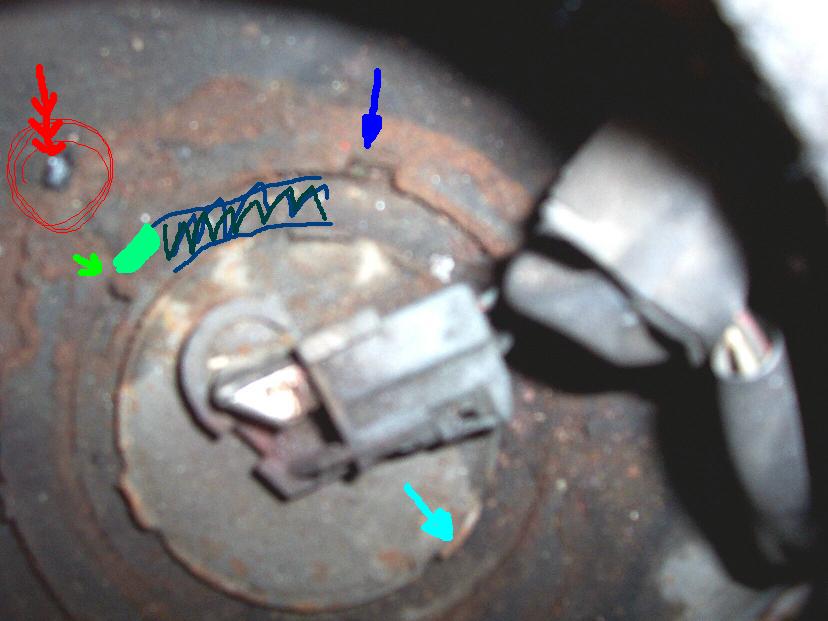
So what to use.. first let's look at how exactly the sending unit is held on there.
The green/blue shade is the ring that goes all around on top of the sending unit. They don't tell you this in the manual.. and if there's as much rust there as mine had you won't be able to tell. The manual explains in detail "Remove the Sending Unit"... Ahh! It's that easy!
The teal mark is part of the gas tank and is what the ring sits underneath to hold it in place.. there's 3 spots like this.
The light green arrow shows a tab sticking up.. you have to make the whole ring turn counter clockwise so that the space under that green arrow fits through the teal spots.
The top Blue arrow is part of the sending unit and is just there so you don't place the sending unit any other way than it should be.
That red arrow thing is a leak.. patch that up with some metal putty.. it worked great.
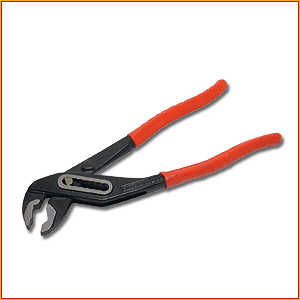
The guy at honda told me to use a long nose pliers to remove the sending unit but he was talking straight from his ass.
I used these:
Supposedly they're called water pump pliers.. I call them pliers.
Now the problem here is I can't tell your exactly what size you'll need.. so you'll just have to try some out. Adjust the mouth of the pliers to be as wide as possible. Looking at the pic, have the left tip sitting where the green arrow points to. (Top of the little tab)
Then have the right tip sitting at the bottom of the light blue tab. Basically so that when you twist it counter clockwise.. the ring wants to turn. Keep doing it this way until the damn ring comes out.. you will have to switch tabs at one point as there won't be any space.
Now take out the sending unit from the gas tank.
You'll see an orange wire that twists down and connects to something that looks like a sensor.. that something is a sensor. When there is no liquid inside.. it deactivates.. when there is some it activates.. you get the point.
Now get a multi-meter with the option that has the BEEEEP sound when there's a closed connection. Attach one wire to the connection at the sensor (without touching ANYTHING else but the soldered connection). Then put the other wire anywhere on the sending unit that's made of metal.. there shouldn't be any sound.. if there is then reposition the wire at the sensor and try again. Then attach it to the C terminal and listen. If there is sound.. then try putting one connection on the actual sensor.. and the other at the A terminal.
If there is still sound then the sensor is broken.. but these break very rarely as they're extremely simple so you're probably reading this for no reason.
If there's no sound from the sensor solder point to C terminal.. then obviously there's a break somewhere in between. Most likely on the top of the sending unit where the connection passes through or the orange wire is cut somewhere.
The same goes for connection between the sensor and A terminal.. but that's a ground problem.. and if it was the case then the fuel gauge wouldn't work either.
If the connection from the orange wire to the C terminal is bad.. then I suggest using a dremel to cut out (drill out) the plastic all around the copper connection at the top of the sending unit.. You will see the connection is clearly made of copper. Now test from that copper point to the orange wire again.. now you know exactly where the cut was/is. You can punch the copper thing out.. it falls out from the bottom so hit it from the top. Then you can drill through it and solder on a new wire which is exactly what I did to mine.
The Low fuel light takes a while to turn on.. but is very quick to turn off. (the gas slowly "evacuates" when leaving the sensor therefore it takes its sweet ass time).
Now I don't ever wanna hear you say "My gas light doesn't work".
_________________
_________________
_________________
Fuel gauge Fix
Here's another fix.. figured I'd add it to this since they're basically related.. almost.
http://media.honda.co.uk/car/owner/...sf100/16-88.pdf
Do the same thing as before.. remove the access cover and disconnect the plug. Read and do step #4. If you still haven't found the problem then.. hey #4 is not for you.
Guess which number might be then.. you guessed it.. #5 and #6. But wait.. can't do #6 for a particular reason? Yeah.. your fuel gauge is already indicating that it's full and passed the F (Fcking broken) mark. In this particular case. You'll need to remove your gauge cluster.
ARGHHHH
It's fairly easy but the first time might be a bitch. http://media.honda.co.uk/car/owner/...sf100/14-46.pdf
First, Remove the 4 switches. That's the Hazard/Defogger switch, Cruise/sunroof Switch (Simply sunroof switch for some), Headlight/fog light switch (simply headlight switch for some) and the Dimmer/Brightness Controller.
They pop out with a flathead screwdriver. Be careful not to chip the two bottom switches. Unplug them all of course.
There is 3 screws under the top of the Switch Panel.
There's 1 behind the headlight/fog light switch and another 1 behind the dimmer switch.
Hell I'm too lazy for this.. read this http://media.honda.co.uk/car/owner/...sf100/16-82.pdf
Because I've never done it on an 88-89 prelude before (speedo cable).
Once you have it out, look at page 6 and remove the front plastic visor. Now reconnect the gauge cluster to the plug wires. Now.. take out the key from the ignition if it's in and push down on the fuel gauge needle to put it to E or halfway.. where ever. Put the key back in and watch it closely. So it's probably going back up by itself. Hip hip.. hurray!
Go buy a new Fuel/Temperature Gauge!
But before you do (if you don't have one in stock and your low on budget), Look at page 6 again and remove the fuel/temperature gauge by unscrewing the 6 screws in the back (3 for the temp side and 3 for the fuel side).
http://media.honda.co.uk/car/owner/...sf100/16-80.pdf
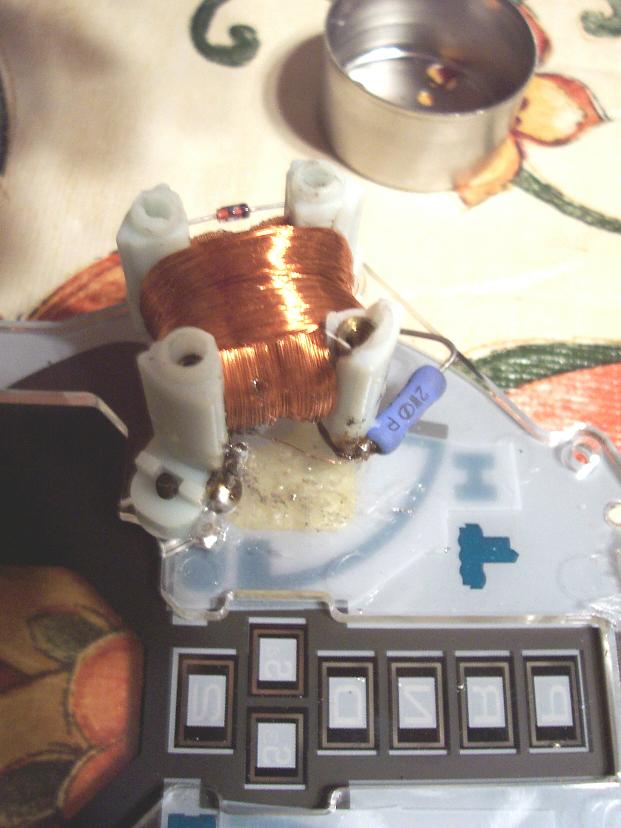
Look at page 2 for details on how the gauges work. Now Notice over the coils there is a metal cap over it. They simply pop off. Page 2 says "Two Intersecting coils are wound around the permanent magnet rotor."
By "coil" they mean the copper wires that go around and around. There is 4 white plastic towers. At the base of one or two of theses "towers" you will see where the copper wires go to.
There's two that go to that blue resistor looking thing.. and another 2 that go to the red resistor thing on the other side. You will notice that one of the 4 wires (or more) are cut.
You can try to re solder them back together.. That's what i did and it worked for a little while until the solder came undone.. my solder gun is a bit big though so it wasn't the best to use for the job. I ended up buying another fuel/temp gauge that's been working ever since.
Of course.. if the gauge is working perfectly.. then you just wasted your time reading that.. bwuahaha.
Remove the Fuel sending unit (Go up to the "Low Fuel light Fix" section for details).
With the Sending unit in hand, light a match, you have just realized that the strange liquid burns.
Actually go to step #5 and follow it. If you get fcked up resistance's then try opening up the little METAL (not plastic) box where the black plastic box hinges itself too. You'll notice that when moving the black box, it slides a contact onto a bunch of other little contacts which have different resistance's (from smaller to bigger obviously). This is what sends the signal to the fuel gauge to move up and down. Now look at it carefully.. the contacts that change resistance are more than likely completely crapped up. Either they're full of crud or there's some missing and broken.
Replace the Fuel sending Unit in this case as it really isn't worth trying to even fix this thing as it's much too precise.
I saw this happen on a '90 Civic dx. They guy told me his gauge wasn't working, So i told him to remove the sending unit and look at the terminals and the sliding contact thing.. the "sliding contact thing" was the culprit.