Leaking Power Steering Pump/Line of Fluid Under Hood
By Tom Coleman
Link to this page:
BACK TO PRELUDE3G.COM HOME
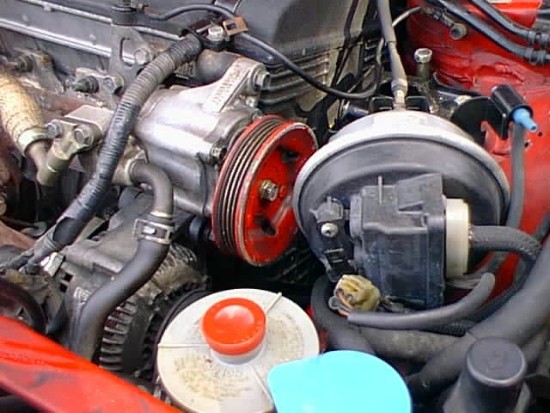
This happens on all years of the 3rd gen Prelude. The P/S pump shaft seal wears out and starts to leak. Then one of two things will happen:
1) If the fluid is leaking "OUT" of the seal, the fluid will get on the pump shaft. When the shaft spins, it throws a line of fluid on the underside of the hood.
2) Sometimes, air will get pulled "INTO" The pump. This causes the fluid to foam. When it pulls enough air into the system, fluid will bubble out of the reservoir.
Either problem is messy and a pain in the butt.
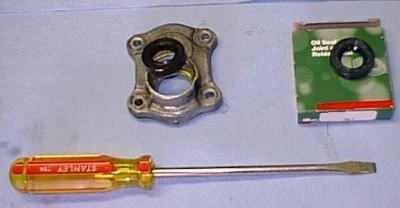
You can now buy the seal from the Honda dealership. The part number is: 91201-PC1-003 and costs around $6
To install the new seal, see the directions below:
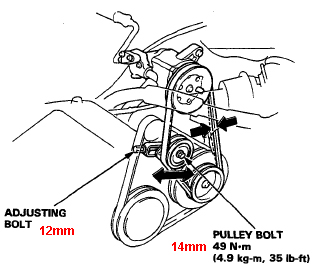
First, you need to loosen the bolt that holds the pulley on the pump. You have to remove the cruise control module to get to the bolt and to get the belt off. It requires a 12mm socket to loosen the bolt.
THIS BOLT IS HAS A LEFT HAND THREAD. YOU HAVE TO TURN IT CLOCKWISE TO LOOSEN
IT.
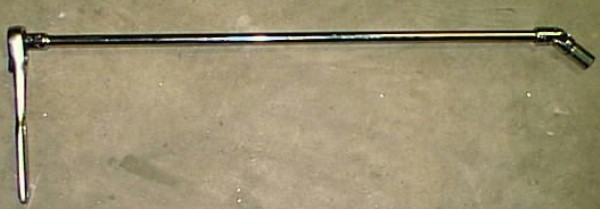
Once the bolt is loose, you have to remove the belt. There is a 14mm nut on
the P/S steering belt pulley that need to be loosened. Then you have to use
a 24inch extension with a 12mm socket on it with a universal extension. See
the pic below for the tools needed to loosen the belt.
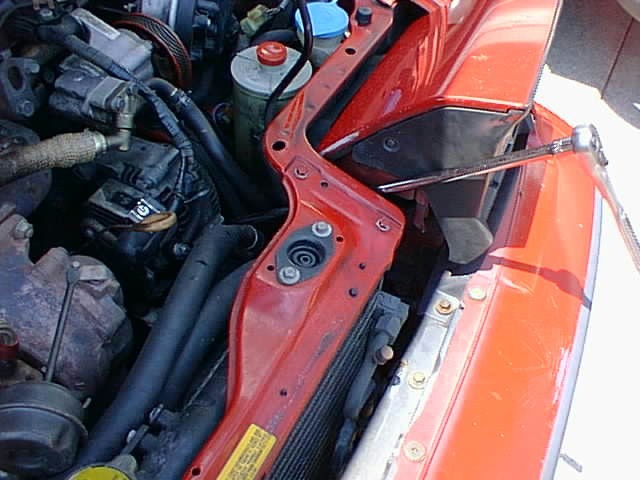
Then flip the headlights up, and feed the socket and extension next to the
headlight until you can put the socket on the bolt that loosens the P/S belt.
Spin it counter-clockwise until you can remove the belt. Now you can remove
the pulley bolt and pulley.
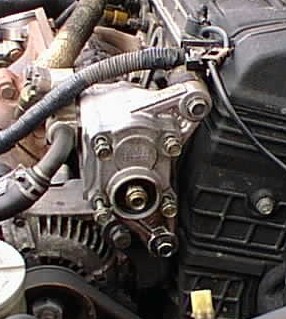
Next step is to remove the pump cover. Remove the 4 10mm bolts that hold it
on. You might also need to tap it with a hammer to get it off. Make sure you
have a rag under the pump because some fluid is going to leak out when you remove
the cover.
Next take the cover to a workbench. Try and keep it as clean as possible. Get
a long screwdriver and pry the old seal out of the cover. Be sure to note which
side of the seal faces up.
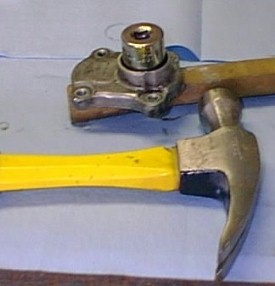
Now insert the new seal into the cover. You can press it in most of the way
with your thumbs. To get it to fully seat in the cover, use a large socket and
hammer and tap it until it is fully seated. The socket should only be a tiny
bit smaller than the seal. You should also lay the cover on a narrow piece of
wood so the dowels on the underside of the cover do not get damaged when you
hammer the new seal in.
**NOTE: I had my seal work its way out of the housing for some reason. So I
used some gray RTV to help keep the seal in the housing. Use the THINNEST layer
of RTV that you can. It should BARELY coat the inside of the housing. You don't
want to use too much or it might get into the system. Also, if you look on the
backside of the housing, you can see a small hole that goes between the two
machined areas. Make sure the RTV does not clog that hole.
Now just put it all back together and fill the fluid reservoir. That's it. No more cleaning that crap off the underside of the hood.