3G Prelude Reverse Indiglo Gauges and Indiglo Needles By: Jeff S (three11jeff) Link to this page:
Reverse Indiglo Gauges
Where Can you get them?
Procarparts.com
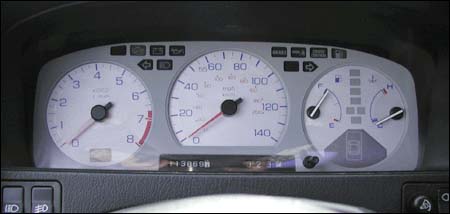
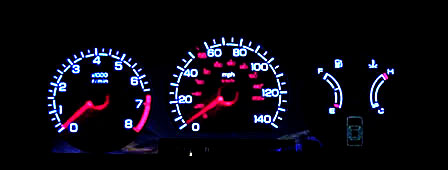
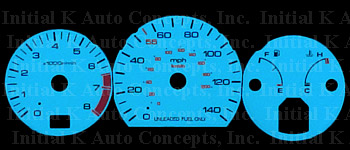
Pro Car Parts Makes The reverse Indiglo Gauges for 88-89 Preludes. They are
made in Silver and White and illuminate in either Blue or Green at the flip
of a switch. Procarparts.com sells them for about $60, but they are generally
sold on ebay starting around $30. So check Ebay first! And yes it says they
are made for Automatics, But they work fine with manuals. The only deference
is in the temp and gas gauge it has the rectangle holes so you can see what
gear your in with an automatic. If you have a manual (like mine) just match
the color of the gauges with a piece of paper and tap it on the back.
These Gauges are a must have!
What if I have a 90-91
Indiglo Gauges are made for 90-91 and I have only seen them on ebay titled as
this...
RARE!! 90-91 HONDA PRELUDE MT INDIGLO GAUGES
Indiglo Needles
Once you get the Procarparts gauges you will notice
at night that they could look a lot better without that green light shining
on them from above. You need that light to shine on them so you can see the
position of the needles. Well Why not make the Needles GLOW?
I researched this and a buddy found me this site http://www.angelfire.com/fl5/import/indigloneedles.html
This is an excellent site and I suggest you read it! I will reference it quite
a bit.
First things first.
You need Different needles, Translucent Needles so light can pass through them.
I went to the junk yard and got a bunch of deferent needles off a variety of
cars. The needles I decided on were off an older Nissan NX.
Nissan NX Needles
The Needles were White when I got them. I painted them red so they would
not blend in with the silver gauges To do this take a razor blade and scrape
of the white paint. Cover the part you do not want colored with tape and paint
them. I first tried to use a permanent red marker but you could still see thorough
the needle, when it was lit by the LED it was not very bright because they need
a solid color to reflect off of. Painting them was an easy solution.
The last thing you need to do to the needles is cut them. They are a little
longer than the stock needles so measure them in relation to the stock needles
and cut them.
If you look at the bottom of the Nissan NX needles you will see a weight in
the needle. You need to remove this. The stock prelude needles have no weights
and if these are left in you will get false readings.
Weight removed out of the Nissan NX needle
Using LEDs to light your needles
This part I will direct most everything to this site
http://www.angelfire.com/fl5/import/indigloneedles.html.
The site will tell you how to shave down the LED, make a hole in the gauge near
the needle and how to secure them. I used a clear 2 part epoxy and they are
very stable. Hears my pic... more pictures at that site.
Wiring
LEDs have a positive and negative side, the longer
side is Positive. As stated on the referring site you will need to run resistors
on the positive end of each LED. Use the same size resistors he recommends and
you can try Newton's law if you really want!
picture is of temp and gas gauge which I never got working :
(
Now you need to find power for your LEDs. I did this
kinda getto style because I do not have a soldering iron. But hey it works fine
and Its a solid connection. Look at the referring site to see how to do it properly
and look at my picture to see how you should not do it.
Now you have power, put the gauge your working on back together. When your taking
the stock needle off be very careful. These are on sometimes pretty tight and
if you pull or push to hard the wrong way it could break or bend then pin. Slowly
pull straight out. Once that's off you can put your new gauge cover on (you
can do this without taking off the needle also). Then you can put the new needle
on, make sure its directly set at 0 and again make sure the needle is on snug
but don't use to much force. Now check them out. How do they look?
Make sure they work before you put everything else back together.
I ran into big problems with the temp and gas gauge
I got an extra one from the junk yard to try and get it to work but failed.
The problems I ran into were....
- The needles I believe are suppose to come off but they are 10 times harder
than the temp and speed gauges -Once I finally got them off I realized there
were weights in the needles.
- I did find some needles that looked like a perfect fit from a Renhault
-Looking at the red circle is the next problem. There are limiter tabs that
control how high and low the gauges can go. The needles I tried to use had that
tab on the opposite end. This picture below shows how I modified them so would
work
-Once I hooked them up the gas gauge was giving me incorrect readings and the
temp didn't even move when the car was plenty warm so I gave up.
The needles did light up beautifully but they didn't work correctly so that
was it. Hey all you really need at night are the Tach and Speed gauges anyway.
That's when all the Racing goes on!